|

Geovision iPhone Setup
To allow remote access to your Geovision system from an iPhone enable these setting on your Geovision system first.
- Click the Network button and select WebCam Server.
- Click the JPG tab, and select Create JPEG/GIF file(s).
- Click the Mobile tab and activate the settings of communication ports.
- Click OK to start the WebCam server.
- Please note that you need to setup port forwarding on your router for the following ports: 80, 8866, and 5511
- Download the GV-iView application from itunes and install it on your iPhone. You can download by clicking on this link: download GV-iView app .
- Click on the GV-iView application on your iPhone to launch.
- On the login screen, enter the IP address of your Geovision system (or the IP address of your Internet connection at the location of your Geovision DVR if you are using port forwarding). Also enter the userid and password for your Geovision system.
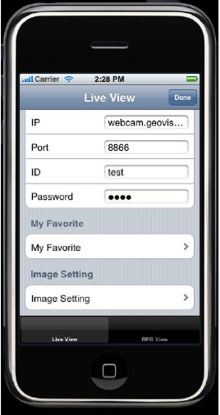
- Click Done.
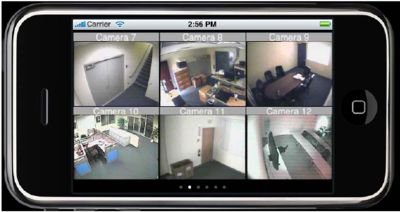
- Once you are connected, the 6 camera view screen will appear as seen below.
- From the 6 camera view screen, click on any of the cameras to navigate to a single camera view for that camera. To the right of the camera, there is a menu system.
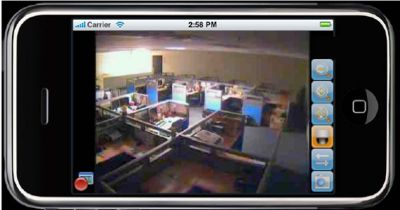
The functions of these buttons is described below.

| |